Once you install both of them, you would just initiatialise vagrant to the OS that you would like to install.
In my case, I am going to install Kali linux which is an OS with a lot of security tools pre installed.
To initiatlise the OS, run the vagrant init command.
vagrant init [name [url]]
In the below screenshot, I run the vagrant init command to install Kali Linux. This will create a vagrantfile in the current directory. The file has details about the OS and the configuration that we are about to run.
1
2
3
4
5
6
7
D:\Virtual-Machines\Kali>vagrant init kalilinux/rolling
A `Vagrantfile` has been placed in this directory. You are now
ready to `vagrant up` your first virtual environment! Please read
the comments in the Vagrantfile as well as documentation on
`vagrantup.com` for more information on using Vagrant.

D:\Virtual-Machines\Kali>
Resizing the default disk size
The default disk size is about 10GB and I want a bit more for some reason. To do this, I would configure a larger disk size. Prior to updating the disksize in the Vagrant file, we need to install a plugin that helps in resizing a file:
vagrant plugin install vagrant-disksize
Once that is installed, I would review and update the vagrant file accordingly. Notice, config.disksize.size = ‘80GB’ was added manually while all the remaining lines were created during the init.
# -*- mode: ruby -*-
# vi: set ft=ruby :
# All Vagrant configuration is done below. The "2" in Vagrant.configure
# configures the configuration version (we support older styles for
# backwards compatibility). Please don't change it unless you know what
# you're doing.
Vagrant.configure("2")do|config| # The most common configuration options are documented and commented below.
# For a complete reference, please see the online documentation at
# https://docs.vagrantup.com.
# Every Vagrant development environment require a box. You can search for
# boxes at https://vagrantcloud.com/search.
# BOX SETTINGS:
config.vm.box="kalilinux/rolling" config.disksize.size='80GB' # config.vm.box_check_update = false
# NETWORK SETTINGS:
# config.vm.network "forwarded_port", guest: 80, host: 8080
# config.vm.network "forwarded_port", guest: 80, host: 8080, host_ip: "127.0.0.1"
# config.vm.network "private_network", ip: "192.168.33.10"
config.vm.network"public_network" # config.vm.synced_folder "../data", "/vagrant_data"
# Provider-specific configuration so you can fine-tune various
# backing providers for Vagrant. These expose provider-specific options.
# Example for VirtualBox:
#
# PROVIDER SETTINGS: Changing the CPU and memory of the VM:
config.vm.provider"virtualbox"do |vb| # # Display the VirtualBox GUI when booting the machine
vb.gui=true #
# # Customize the amount of memory on the VM:
vb.memory="4096" vb.cpus=4end #
# View the documentation for the provider you are using for more
# information on available options.
# Enable provisioning with a shell script. Additional provisioners such as
# Ansible, Chef, Docker, Puppet and Salt are also available. Please see the
# documentation for more information about their specific syntax and use.
# config.vm.provision "shell", inline: <<-SHELL
# apt-get update
# apt-get install -y apache2
# SHELL
end
Note that to make changes to the CPU or Memory, you would do under the providers section. In the above case, I had uncommented the default section and modified the memory and CPUs.
Powering up the machine
The following command would automatically open VirtualBox and run the OS
D:\Virtual-Machines\Kali>vagrant up
Bringing machine 'default' up with 'virtualbox' provider...
==> default: Checking if box 'kalilinux/rolling' version '2021.2.0' is up to date...
==> default: Clearing any previously set forwarded ports...
==> default: Clearing any previously set network interfaces...
==> default: Preparing network interfaces based on configuration...
    default: Adapter 1: nat
    default: Adapter 2: bridged
==> default: Forwarding ports...
    default: 22 (guest) => 2222 (host) (adapter 1)
==> default: Running 'pre-boot' VM customizations...
==> default: Booting VM...
==> default: Waiting for machine to boot. This may take a few minutes...
    default: SSH address: 127.0.0.1:2222
    default: SSH username: vagrant
    default: SSH auth method: private key
==> default: Machine booted and ready!
==> default: Checking for guest additions in VM...
==> default: Configuring and enabling network interfaces...
==> default: Mounting shared folders...
    default: /vagrant => D:/Virtual-Machines/Kali
==> default: Machine already provisioned. Run `vagrant provision` or use the `--provision`
==> default: flag to force provisioning. Provisioners marked to run always will still run.


D:\Virtual-Machines\Kali>
Connecting to the machine
You can then login to the Kali Linux by running the following command
PS D:\Virtual-Machines\Kali> vagrant ssh
[email protected]'s password:
Linux kali 5.10.0-kali7-amd64 #1 SMP Debian 5.10.28-1kali1 (2021-04-12) x86_64

The programs included with the Kali GNU/Linux system are free software;
the exact distribution terms for each program are described in the
individual files in /usr/share/doc/*/copyright.

Kali GNU/Linux comes with ABSOLUTELY NO WARRANTY, to the extent
permitted by applicable law.
Last login: Sun Jun 20 03:24:00 2021 from 10.0.2.2
┏━(Message from Kali developers)
┃
┃ We have kept /usr/bin/python pointing to Python 2 for backwards
┃ compatibility. Learn how to change this and avoid this message:
┃ ⇒ https://www.kali.org/docs/general-use/python3-transition/
┃
┗━(Run: “touch ~/.hushlogin” to hide this message)
┌──(vagrant㉿kali)-[~]
└─$

┌──(vagrant㉿kali)-[~]
└─$
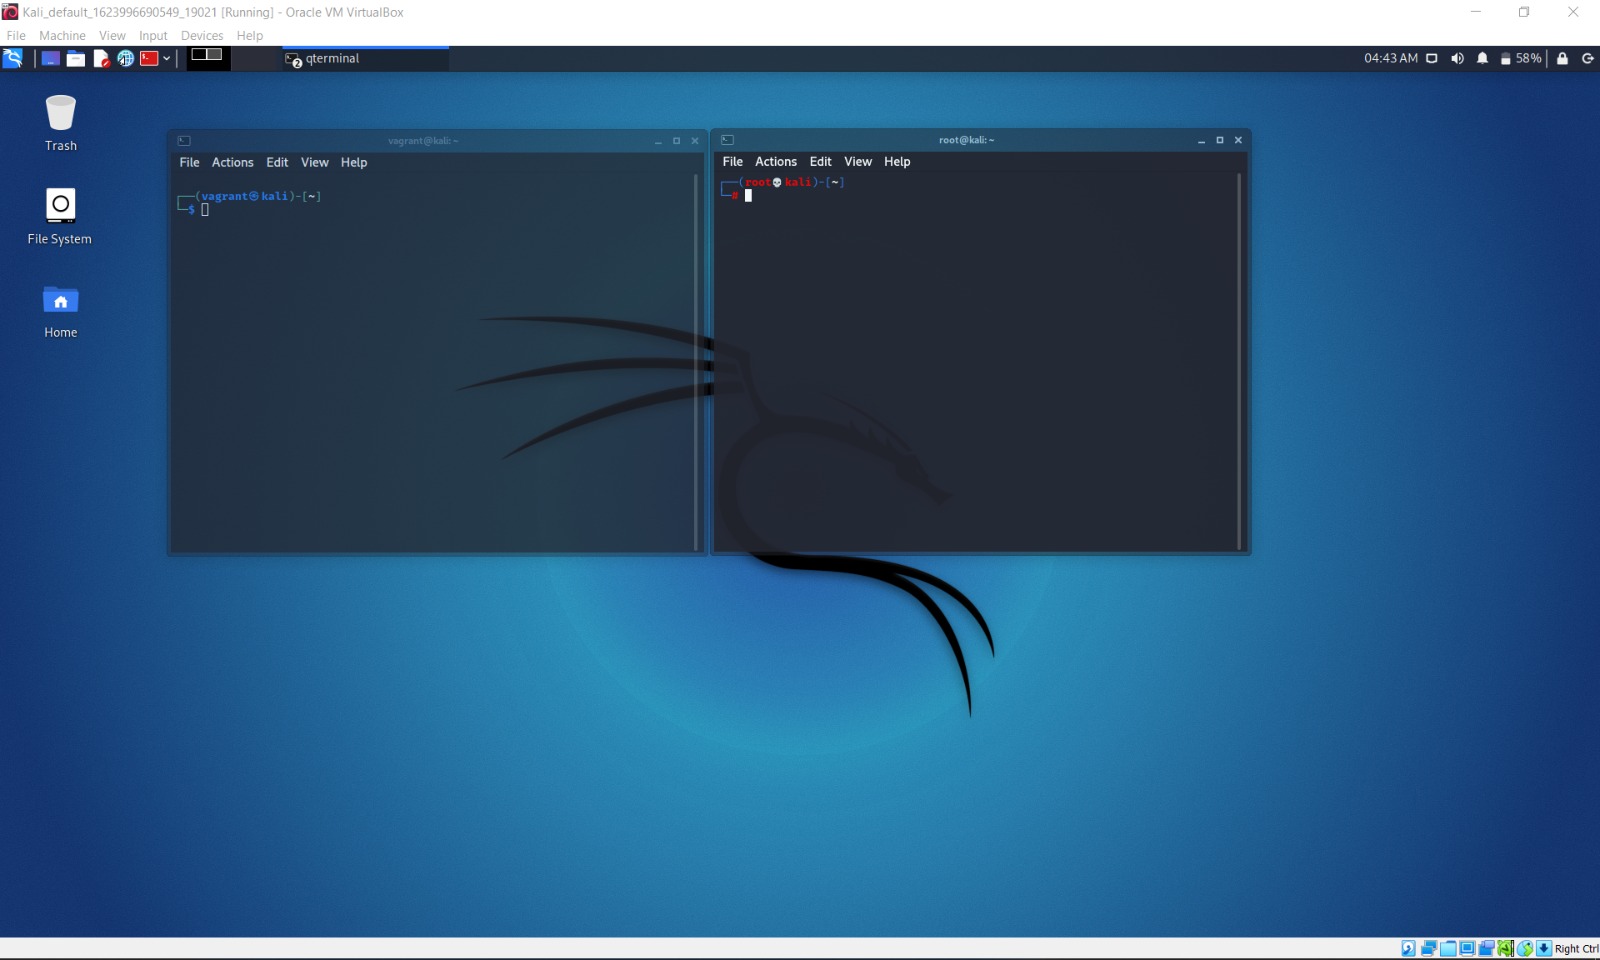
GUI in VirtualBox:
Kali:
Kali running on VirtualBox started by Vagrant
Customising your machine by editing the vagrant file
There are many parameters that can be customised to meet your needs. In the below example, a port is made open on the guest and made available to the host, the second adapter has been set to a private network and the IP provided by DHCP, a shell gets provisioned when you run the vagrant up command in addition to bringing the VM up.
Provision(config.vm.provision) helps you to run commands inside the shell which would help you further automate items within the server.