Theory
Cloud computing? Not again! that’s too much of hype which I haven’t had a chance to touch and feel.
— Most of the users who know/heard but haven’t ‘touched’ the cloud
Touch the Cloud
I am not going to talk about Cloud computing and blah blah because you can find that in various websites by simply googling it. Well, that being said, no one has a proper definition.
This is one of the leading Cloud computing provider, Amazon’s definition of it’s EC2 range:
“Amazon Elastic Compute Cloud (Amazon EC2) is a web service that provides resizable compute capacity in the cloud. It is designed to make web-scale computing easier for developers.”
Getting started
The goal is to get “compute” capacity from the “internet” which is “fast to provision” and “scalable”.
Objective
Pre-prerequisite
- Amazon account (with access to AWS management console).
- Any Windows machine or any machine which can use Terminal services(RDP).
- Hybridfox for Mozilla Firefox (optional).
- You can register with Amazon Web Service(AWS) for free and till now everything I did here has been for free.
P.S: Anyone who has entered his credit card information can access the AWS management console and create micro instances for 1 year for free.
Kick-off in a nutshell
Be-Prepared
- Be sure you have all the Amazon credentials, all are available under Account>Security Credentials>
- Download your X.509 Certificate which will usually be in the form of ‘example.pem’.
- Keep your ‘Access Keys’ available which are also in the same page, you will need the ‘Access Key ID’ and the ‘Security Access Key’ to access via Hybridfox/Elasticfox.
Create the instance
- Login to your AWS Console using your credentials. https://console.aws.amazon.com.
- Select EC2 tab for Compute infrastructure - Servers.
- Select ‘Launch Instance’ to select the available instances.
- You’ll find three tabs - Quick Start, My AMIs and Community AMI.
- To make things easy for any user to understand, I will select a Windows 2008 Server under Quick Start. There are many instances available ranging from FreeBSD to Redhat.
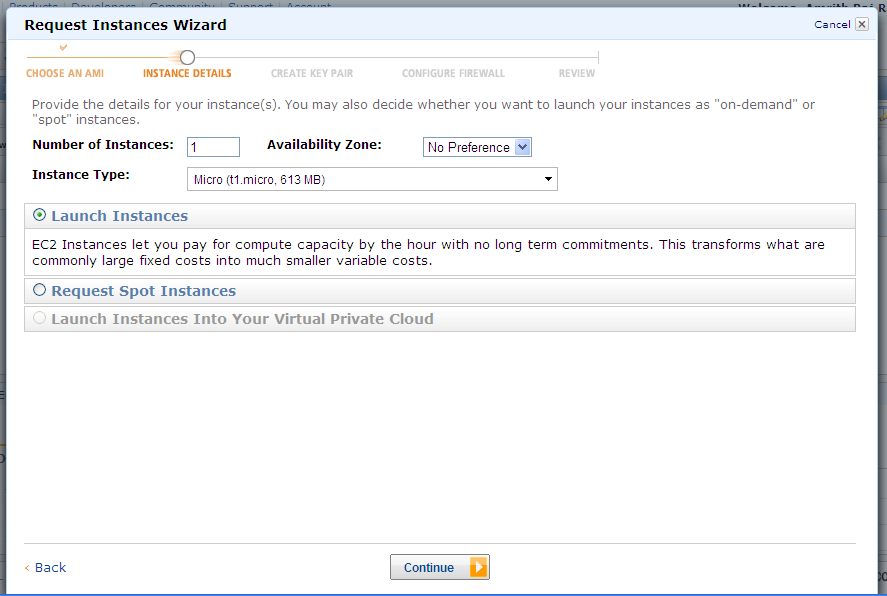
- In the next page, you’ll find options to select the number of instances and the type: ‘Micro’ has the lowest configuration(low RAM, 1 core,1 CPU unit) while ‘High-CPU’ will be maximum available configuration(large RAM, more cores, more CPU units).
- Select the availability zone based on your location (in US).
- In the next page advanced options related to monitoring, termination protection will be displayed. Use appropriately.
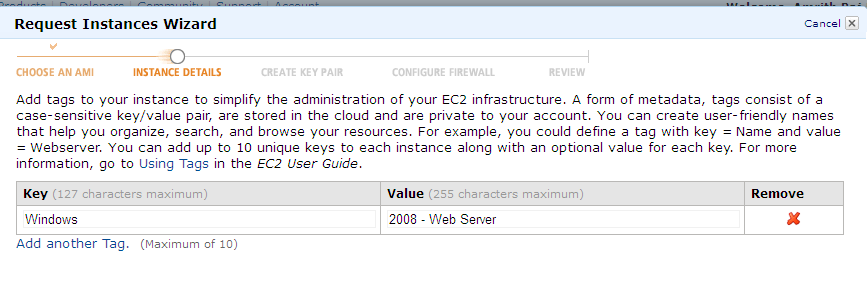
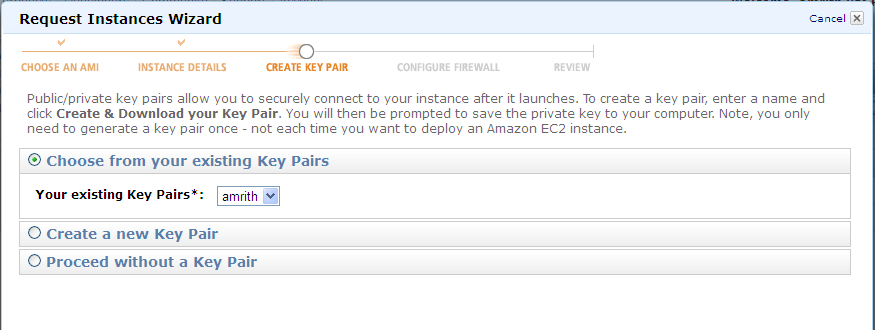
- Select a Key-Value pair for you instance for reference. A form of metadata, tags consist of a case-sensitive key/value pair, are stored in the cloud and are private to your account. You can create user-friendly names that help you organize, search, and browse your resources. For example, you could define a tag with key = Name and value = Webserver
- Select your existing key-pairs, the one created under 2 in the Be-prepared (above).
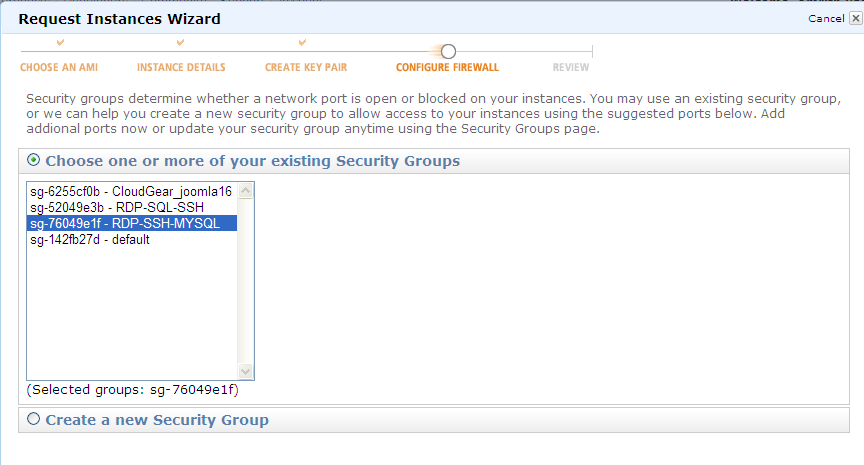
- Selct/Create your security group. You might want to create one where you have RDP, SSH, SMTP etc enabled.
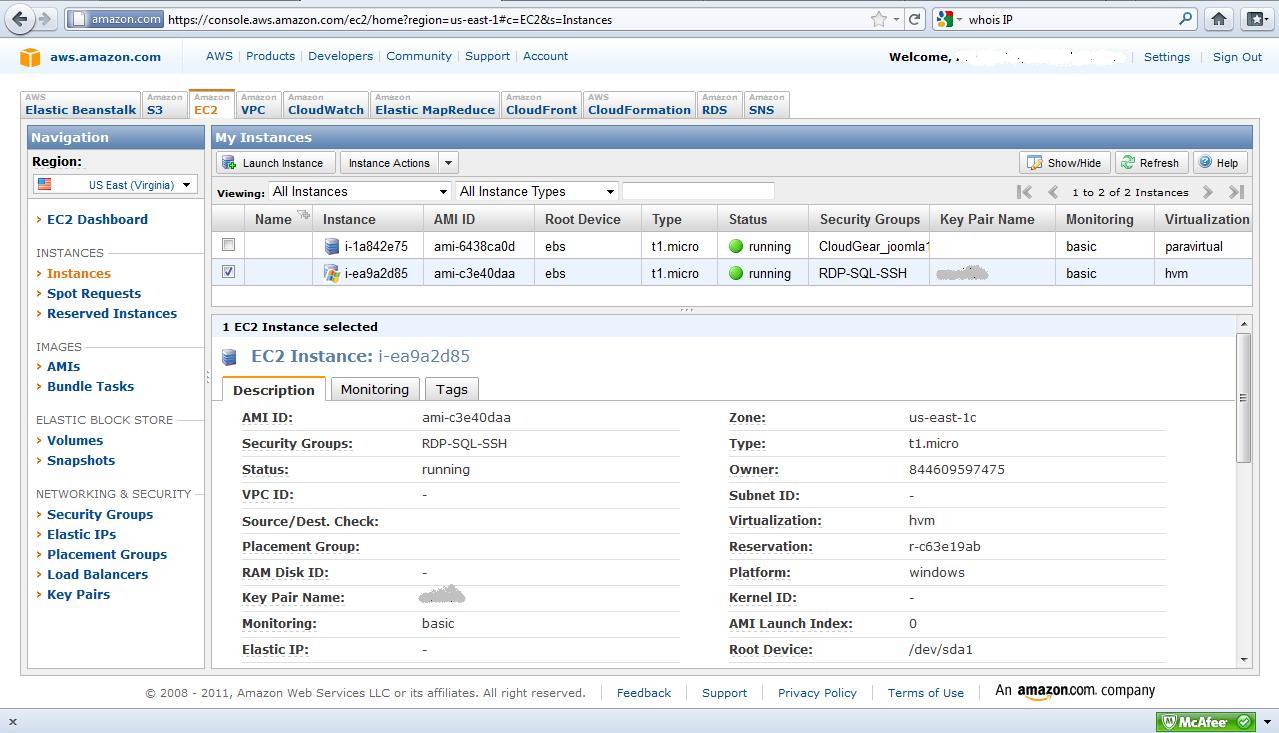
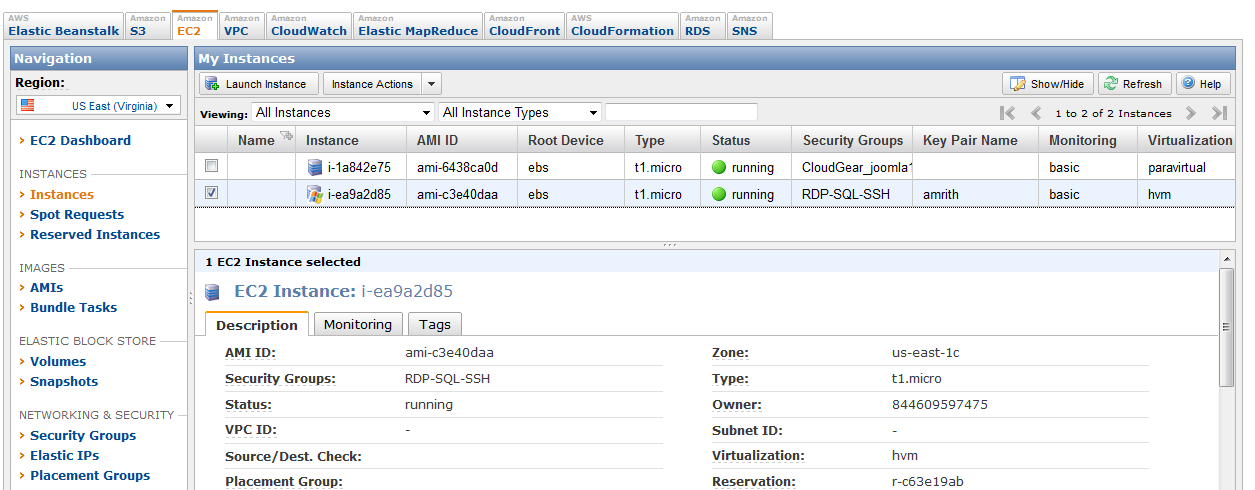
- Thats all! The next page will have a summary of your instance and a button to Launch. It might take a few minutes for the instance to be available. You will see your instance to be ‘pending’ and then in a few minutes it will ‘running’.
Launching you instance
- You will need two things to launch your server(instance):
- Link to connect to the instance via RDP.
- User name and password.
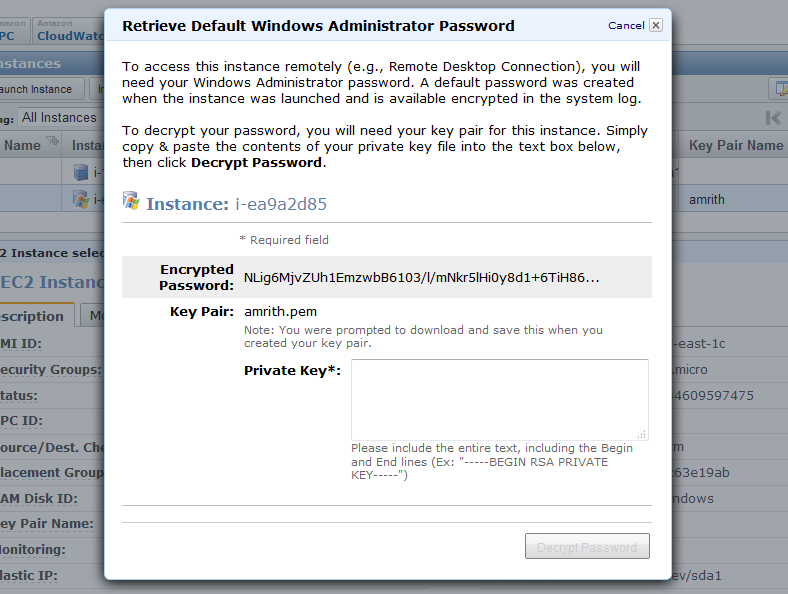
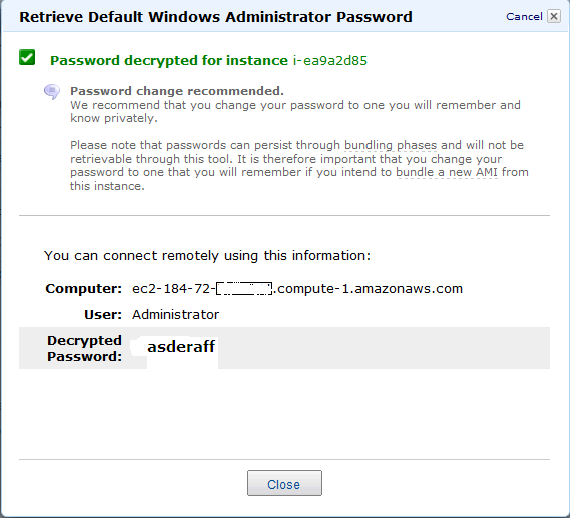
- Generating password will take time and will be ready in a few minutes(upto 30 minutes) and can be generated by right clicking on the instance and selecting ‘Get Windows password’. You will have to provide the contents of you ‘example.pem’ file generated under 2 of ‘Be-prepared’ above.
- Right click on the instance and find an option that says ‘connect’ or ‘connect to instance’ in Hybrid/Elasticfox. For a windows instance, you will find the RDP link which you need to enter into your RDP client and use the password that is generated above.
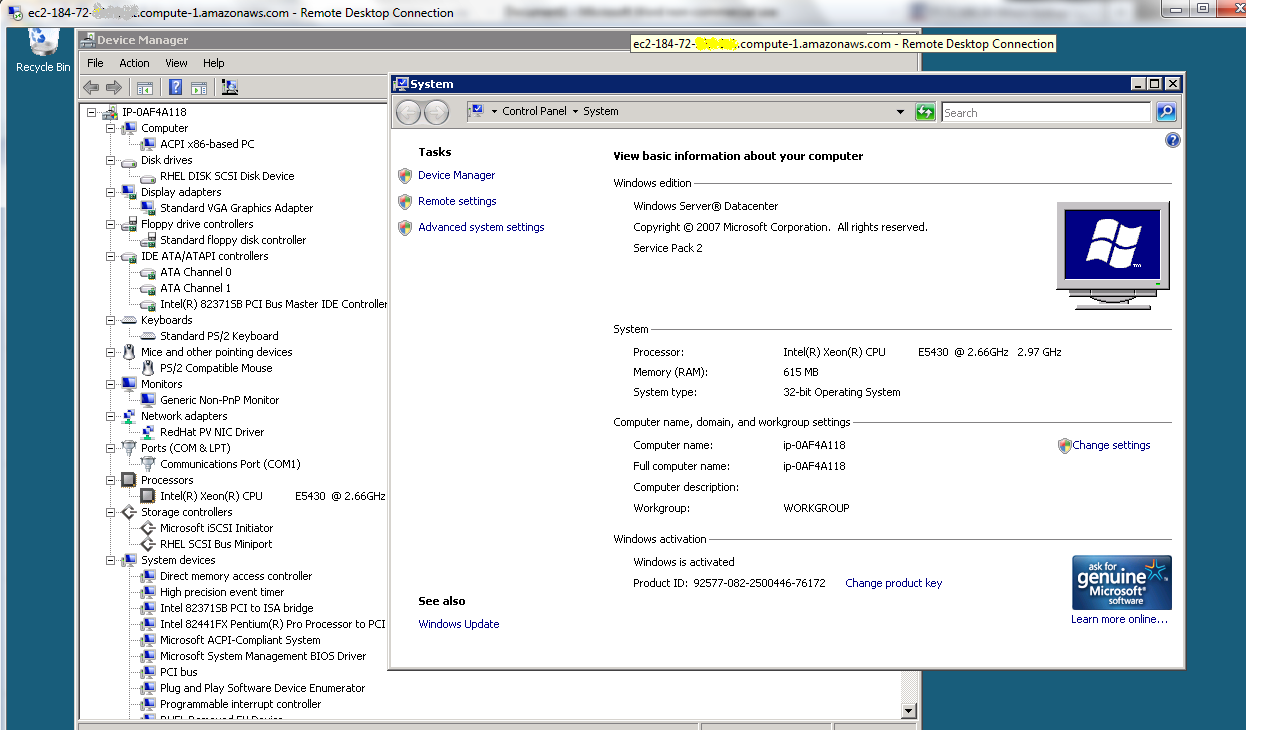
- Thats all! Now start using your server!
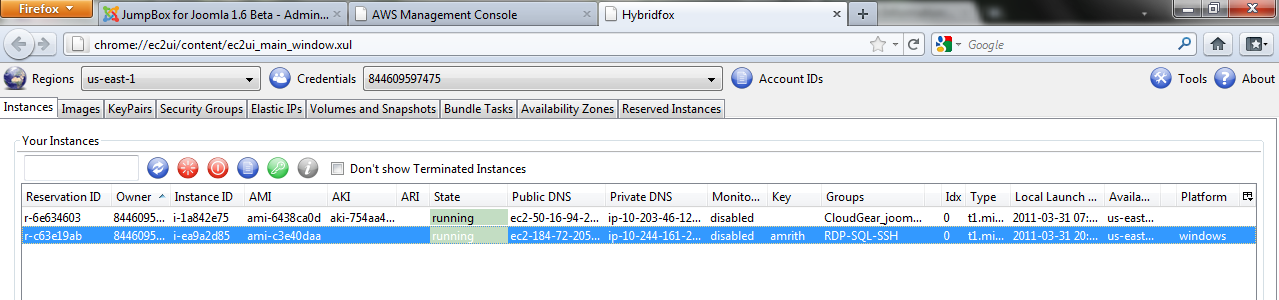
Hybridfox
- Hybridfox was a Firefox add-on that attempts to get the best of both worlds of popular Cloud Computing environments, Amazon EC2(public) and Eucalyptus(private). The idea is to use one Hybridfox tool, to switch seamlessly between Amazon and Eucalyptus accounts in order to manage your “Cloud Computing” environment.
Practicals
You should Screen like the one below:
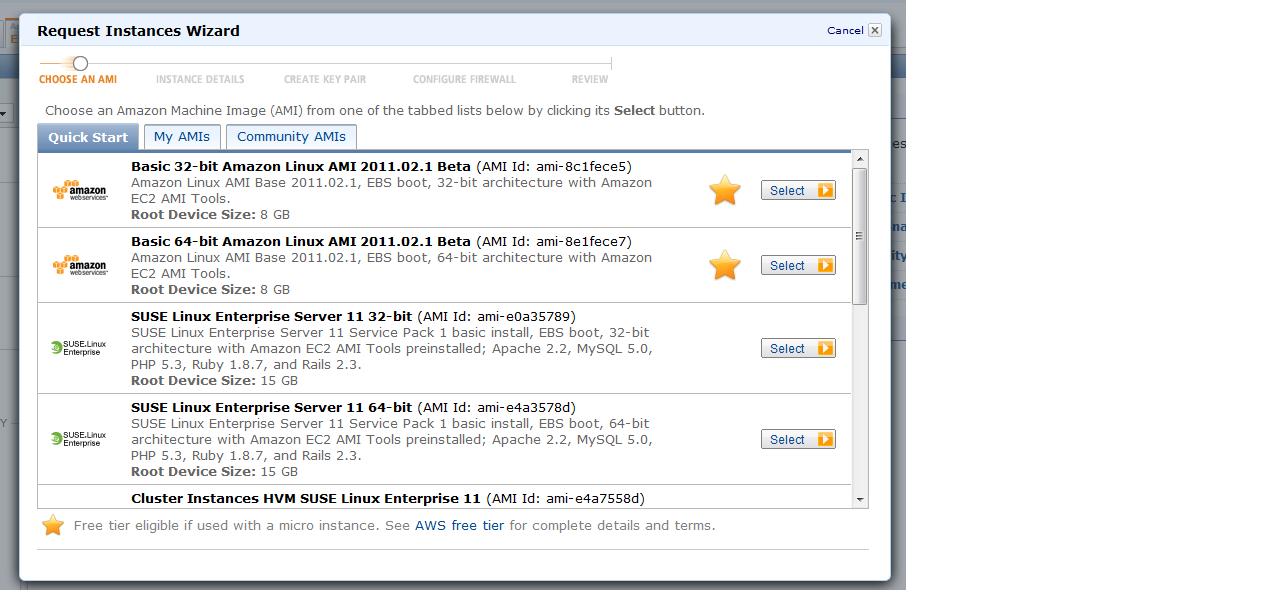
Select your instance type from a wide range of available instances
Select the Number and type on instances
Paste your Private key that you have saved earlier and you will find the option to Decrypt Passoword.
Note: This screen will take several minutes to appear .