In the previous article we talked about how CloudHouse Containers can be used to package Legacy Apps to newer versions of Windows. In this post let me try to show you the steps involved in packaging the app.
The problem: Legacy App doesn’t install in newer operating systems
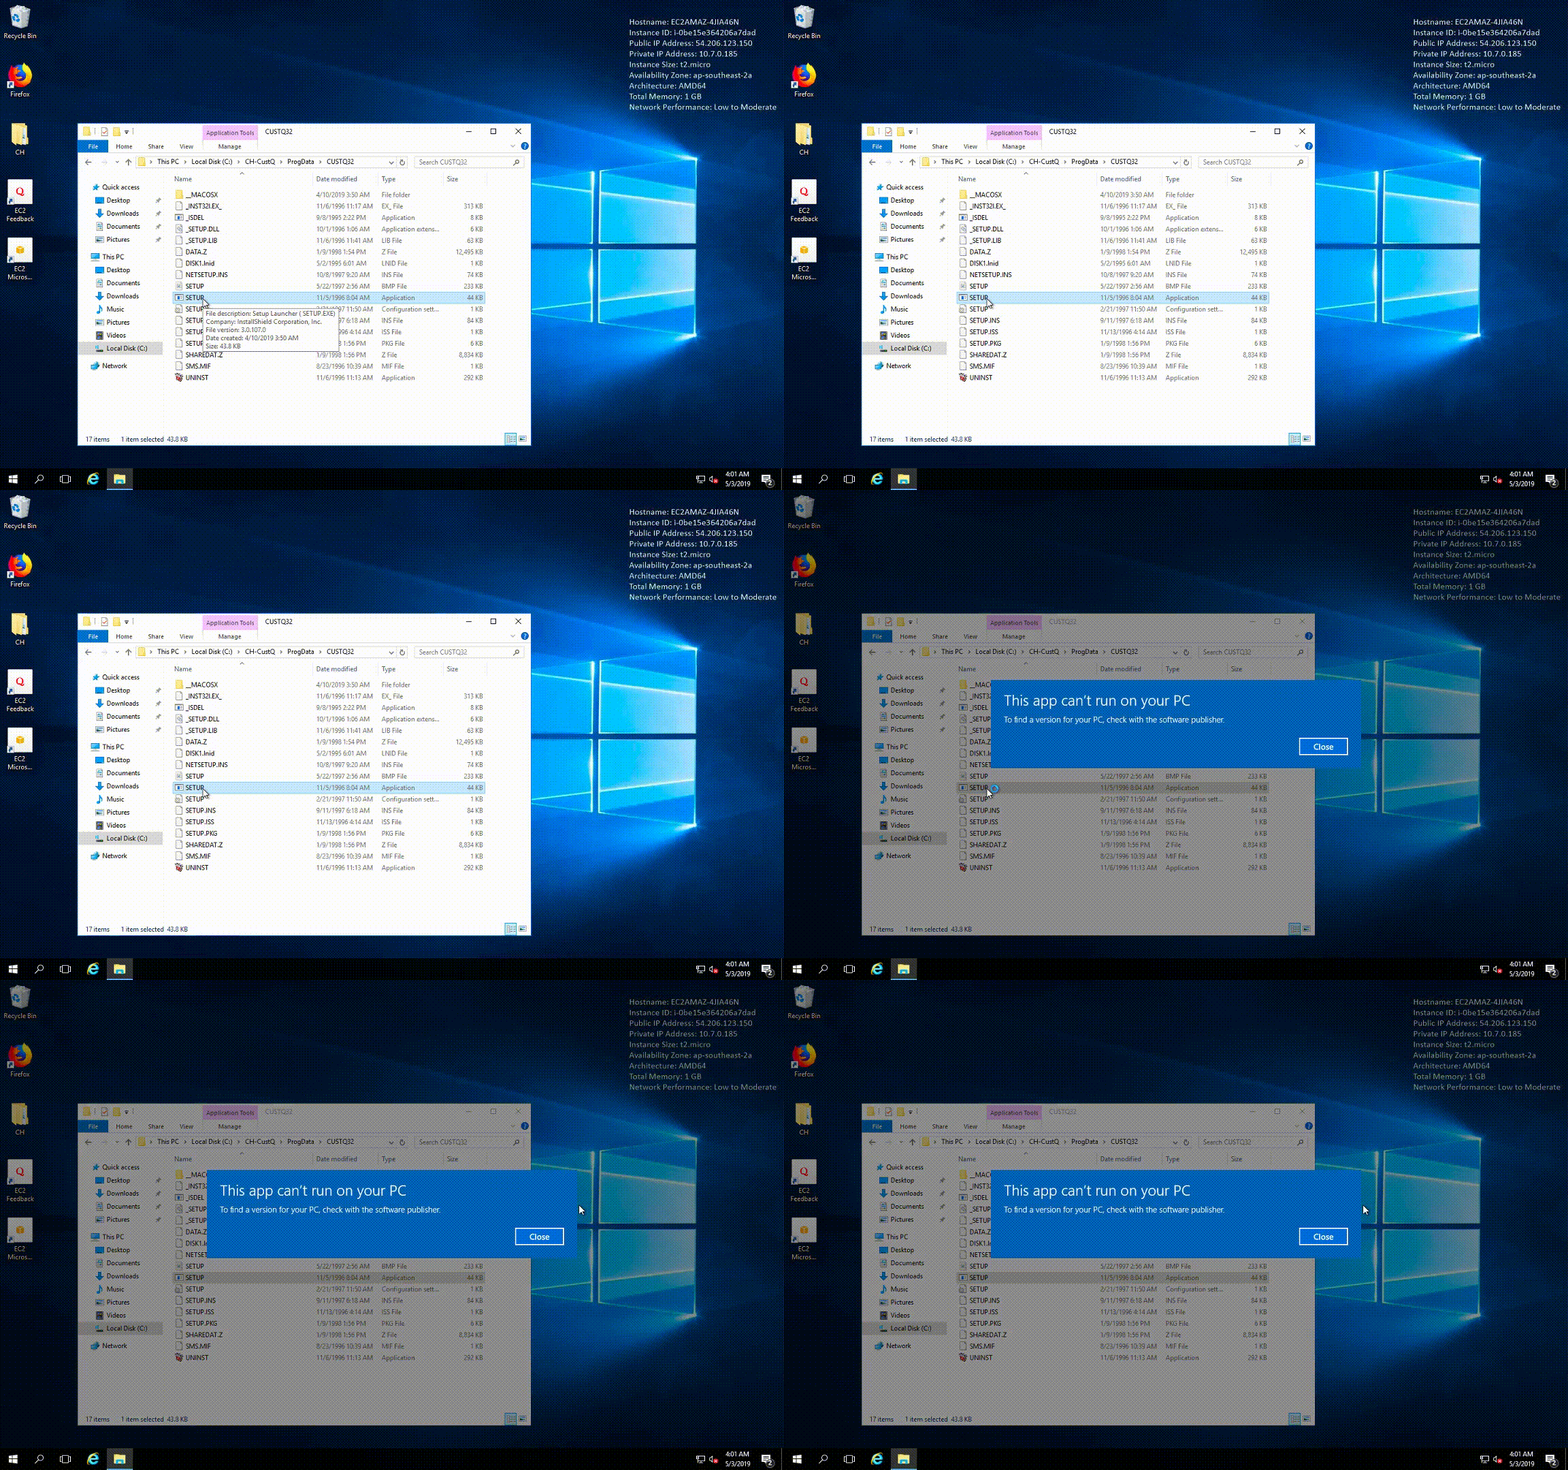
I have the install media of the legacy App but Windows 2016 does not like the software to be installed and complains that App cannot be installed. See the below animation. There is no point in spending time in this server as we know we need to properly package it. Remember this package is pretty old and works only on older version of Windows and thus the above error (think about installing DOS games on newer PCs!).

CloudHouse Packaging: Installing the app in a supported OS
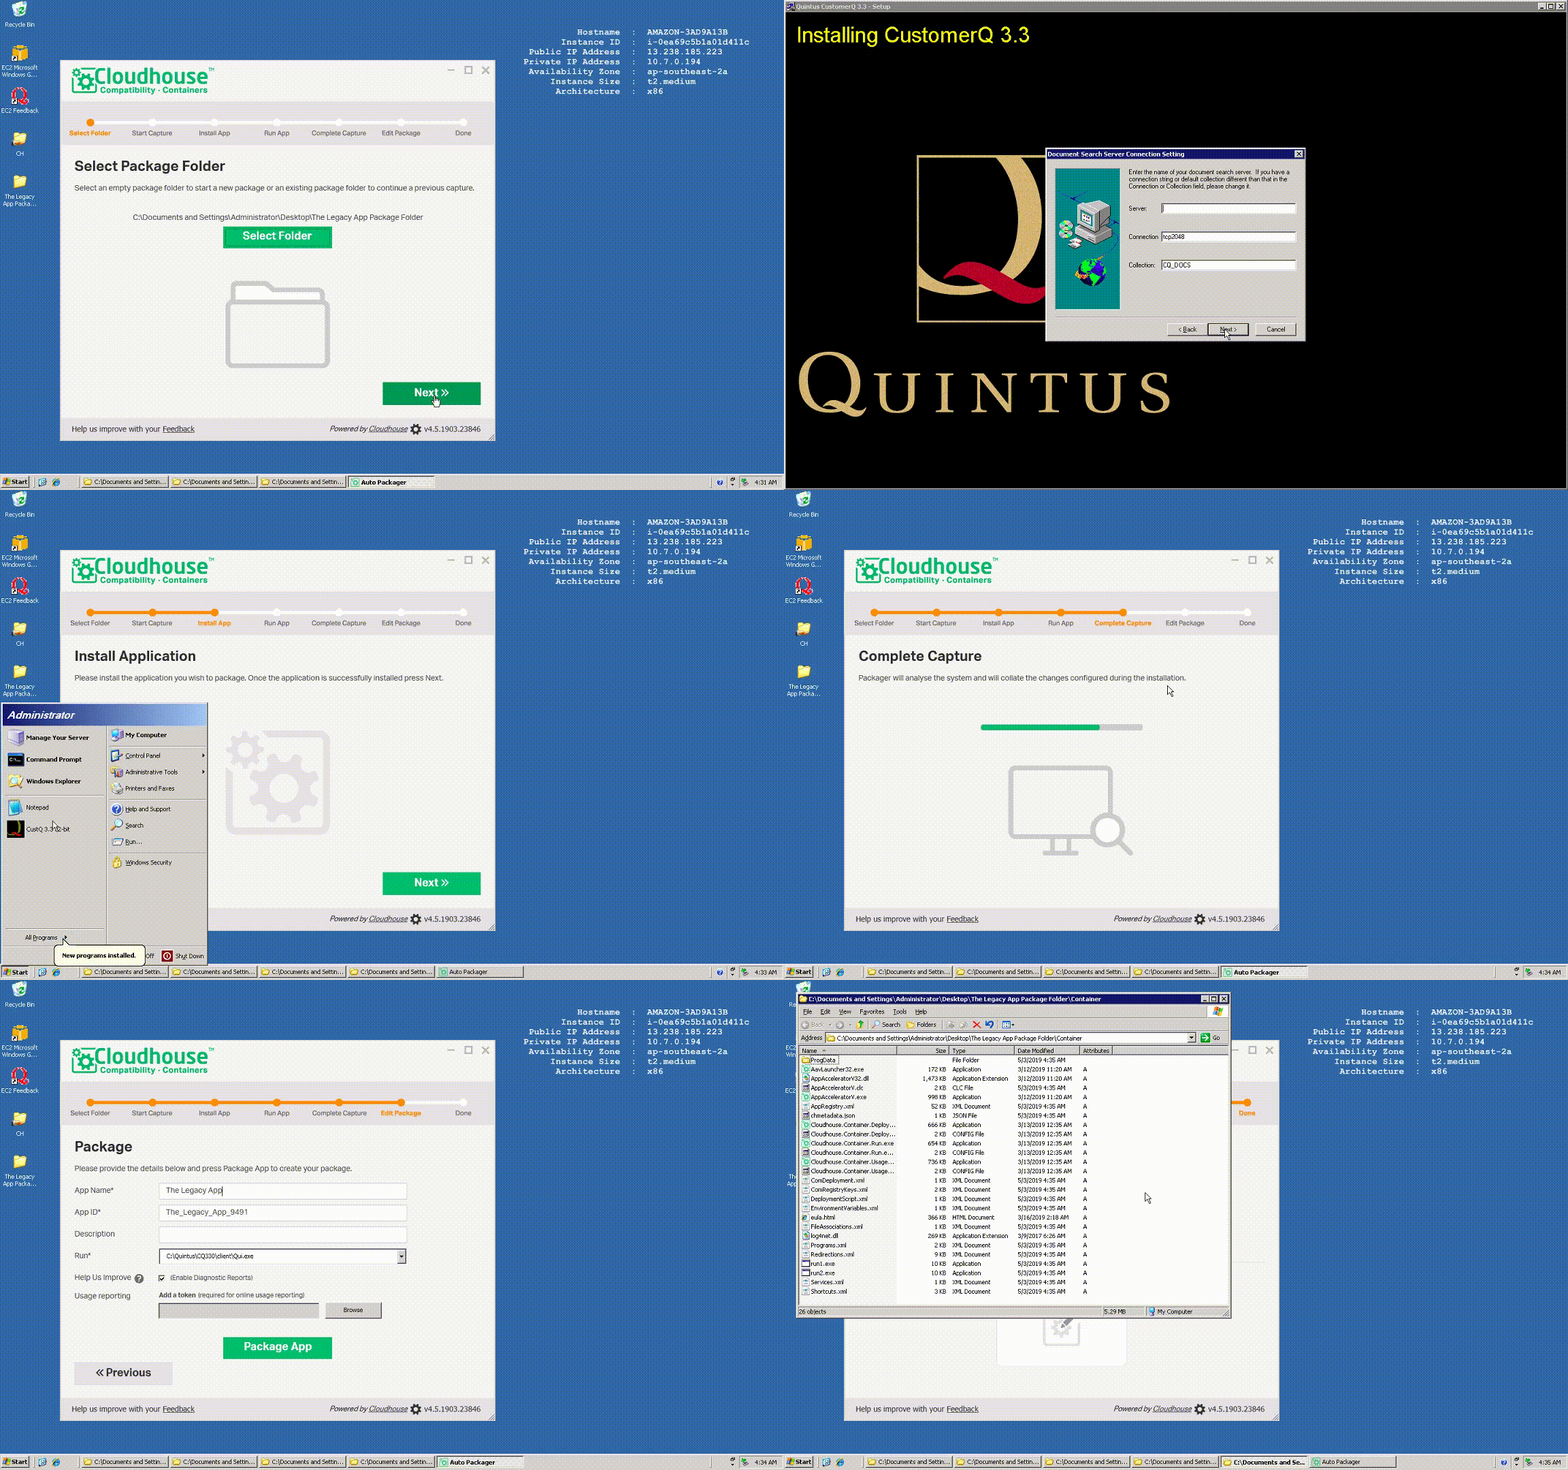
We now need an old server where this package can install successfully. For this, I will launch a Windows 2003 server and copy few magical files provided by CloudHouse and run them first and stand-by to install the App.
Packaging: Capturing and Installing the app
Select Next and start installing the legacy App as if you were installing locally.
Install the legacy App as usual. This is an old version of Windows and so the installer would happily install the software. By the way, it was fun and nostalgic to install legacy Windows app. I wish I could install Road Rash the game but hey they are available online anyways.
What CloudHouse does during this time is to keep an eye of the files and registry changes that the installer is executing on the system. This helps it to understand the App and prepare all the details required to package the App.
You may also want to run the App once to help CloudHouse capture the services that are started. The below animation shows that the App was successfully installed on the old Windows version

Completing the capture
- It would take a few seconds after you select Complete capture. In the next few options, I simply click next and enter default selections to complete the task. In the real world, you may have to modify them to suit the needs(like verifying the registry keys and associated files).
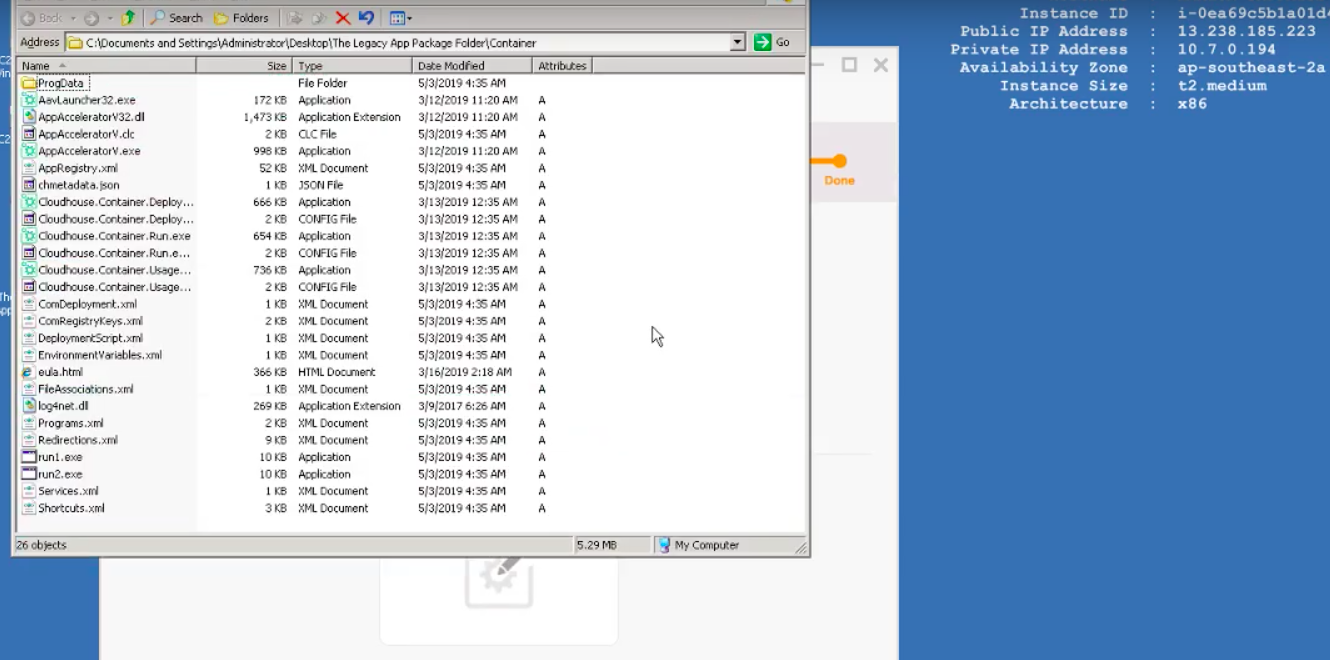
- Completing the capture stores a bunch of files in the folder that we chose earlier. This folder contains all the required files and CloudHouse components to run it on newer systems.

Deploying the App on newer Windows system:
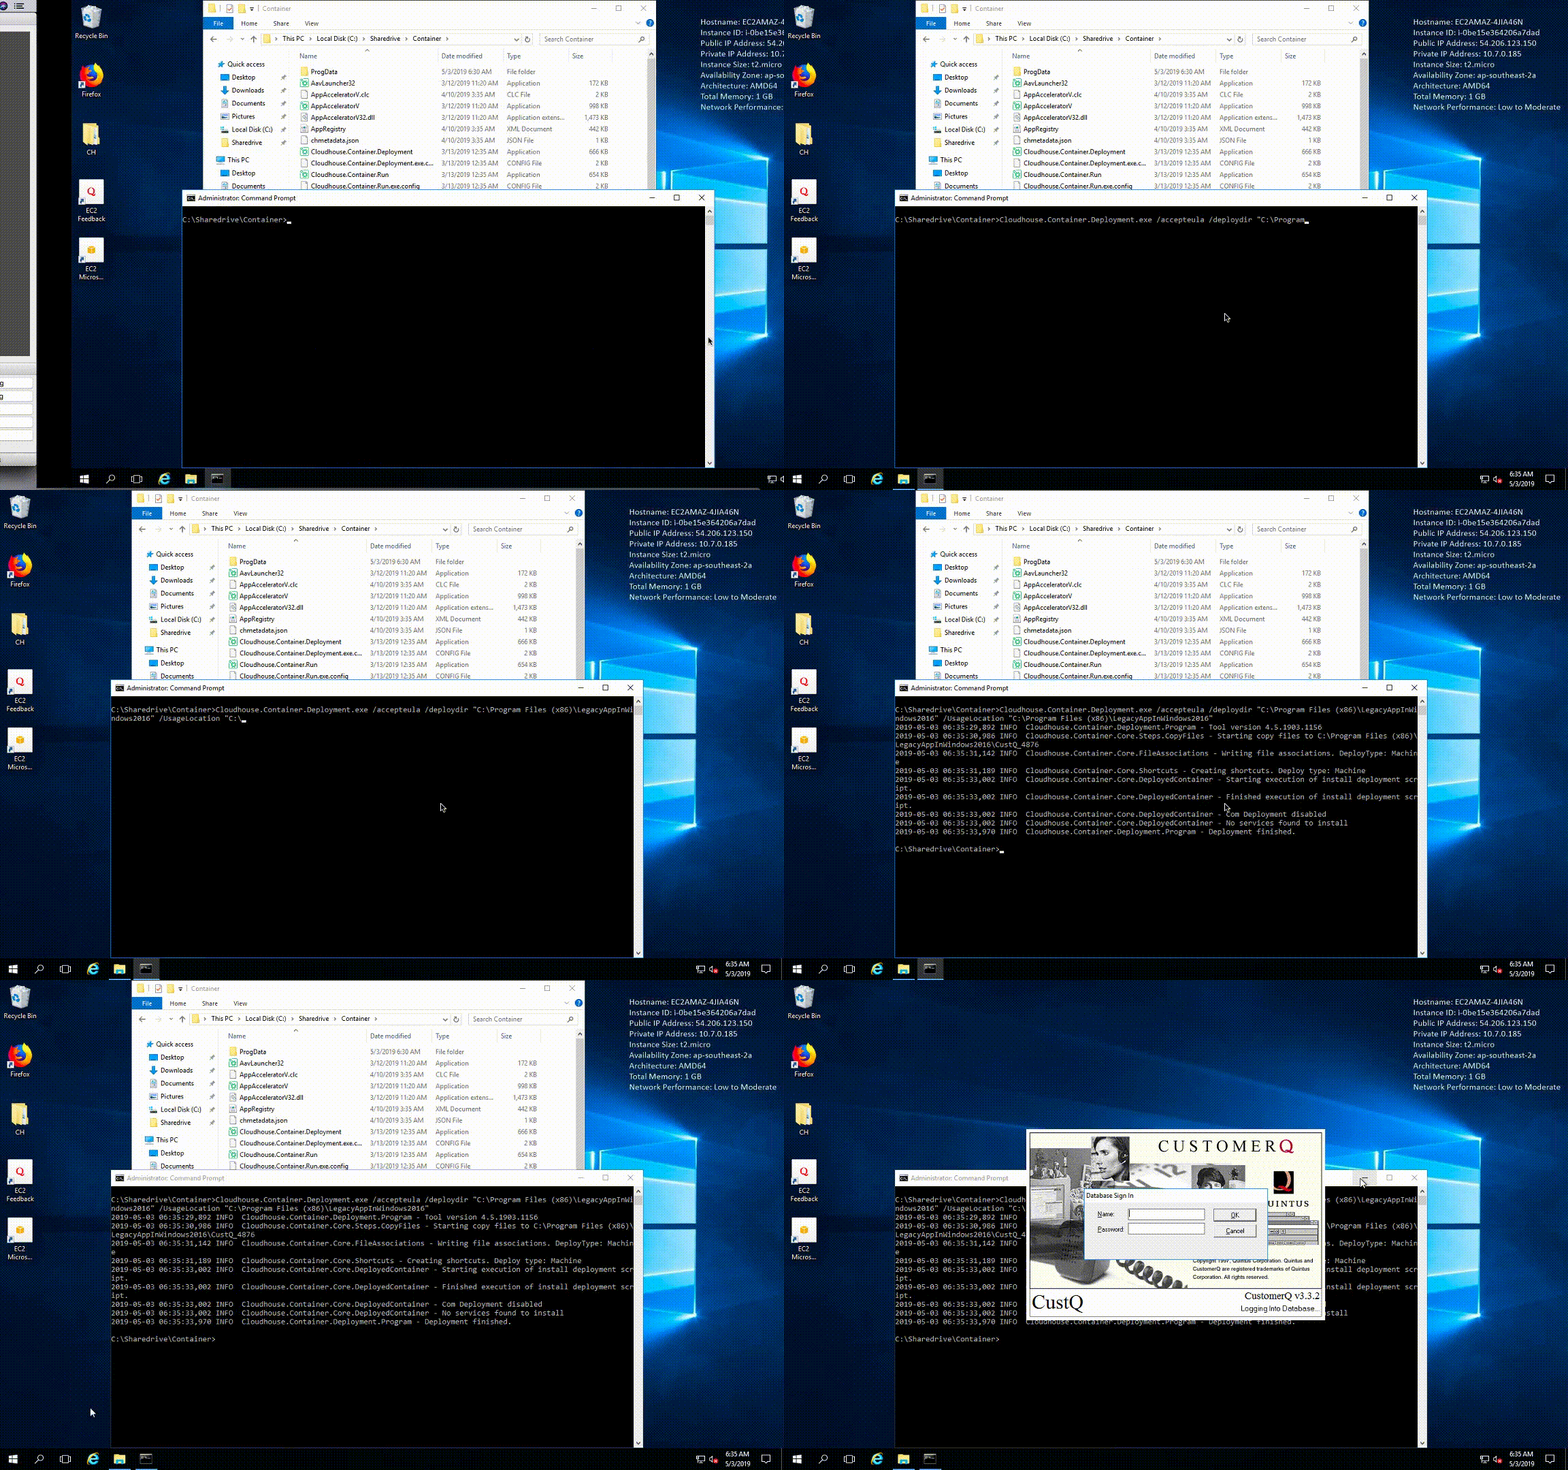
- Copy the whole folder to the destination server which in my case is a Windows 2016 machine.
- Run few CloudHouse commands.
Note: I don’t need to install any CloudHouse software in the destination machine as all the CloudHouse files are binary and thus are directly executable. - The shortcuts show up as you could see below in the end.
- Opening the shortcuts lauches the App

There you go. You could see the app now full deployed and running on a Windows 2016 server with absolutely no code change. Just a couple of clicks and we were able to move a legacy app that just wouldn’t install on newer Windows systems to be able to get it happily run on it.
A note of thanks to CloudHouse for giving me access to their packager and allowing me to try and write about it.
In reality, we wouldn’t have access to the install media as the software would be very old and the organisation would have gone through many changes. For those situations, Cloudhouse can be used to watch the App for few days, the services it runs, the files it uses, the registry keys that it configured and then create a package that can be run on newer systems.
In the world of Cloud, AWS have recently announced End-of-Support Migration Program (EMP) for Windows Server. In simple terms, AWS and partners would be very glad to help clients move even extremely complicated and tightly coupled Apps to newer version of Windows hosted on AWS. The “EMP technology” is available at no cost which means no license fee to get access to the technology. Read more about that here.
In summary, you just saw how easy it is to migrate a legacy app running on unsupported Windows 2003 to newer operating system.
In the meanwhile, have fun!